3-D Printing Brain Model Manual
by Nadia Zulfa Quadri (Lab Manager), May 2019
1.Obtain raw MRI scan data
We are primarily concerned with T1 images because they provide good contrast for 3- D printing. Most likely, raw files will come as series of folders like this: 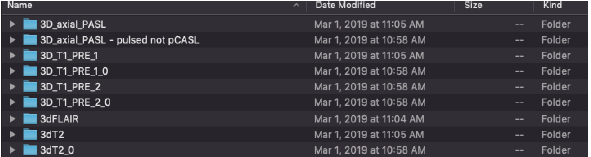
We want to select any of the following 3D_T1 scan folders. In this case, we will choose 3D_T1_PRE_1.
2. Convert raw MRI data into readable files
Raw MRI data comes in compressed DICOM files, so we first need to convert them into a viewable file type called NIFTI. Most MRI scan viewing programs use NIFTI files. Go to https://people.cas.sc.edu/rorden/mricron/install.html and download and install mricron. Mricron is a scan viewing program.
Another program dcm2niigui should be downloaded as well. This will be the program used to convert DICOM to NIFTI. Open the program and this window will pop up:

Select File >> DICOM to NIFTI. Open the T1 folder selected earlier. The program will take a few moments to convert the files. There should be a .nii file in the same original folder. Drag the .nii file to the Desktop. This will make it easier to access later. Double click the file to open in mricron to make sure the scans are clean and have high contrast between the white and the gray matter.
3.Download and install Freesurfer
Now it’s time to convert the 2-D slices into a 3-D projection. This is called a cortical reconstruction. More information about the process can be found here: https://www.youtube.com/watch?v=gkjvKMjH7iM&t=219s
Go to https://surfer.nmr.mgh.harvard.edu/fswiki/DownloadAndInstall and download and install Freesurfer to reconstruct our cortical surfaces.
Next, get a freesurfer license. ****This part is extremely important. Freesurfer will not run without this. Go to https://surfer.nmr.mgh.harvard.edu/registration.html and obtain a license.txt file and download it.
Then, open Terminal on the computer. We will be using this to hard code run Freesurfer. If the program will be run on a Mac, Terminal can be found via Spotlight search.

Type in the following into Terminal and hit enter:
cd ~/Downloads
Then type in the following and hit enter:
sudo mv license.txt /Applications/freesurfer/.license
Next, we will get Freesurfer fully loaded into Terminal each time it is logged in so that it does not have to be manually inputted each time. Type in the following and hit enter:
Sudo nano .profile
Type in the computer password and hit enter. Type the following into the resulting pop up .profile window:
export FREESURFER_HOME=/Applications/freesurfer
source $FREESURFER_HOME/SetUpFreeSurfer.sh
Then hit Ctrl X followed by Y to exit out of the .profile tab. Now, each time a new Shell Window is opened in Terminal, Freesurfer should automatically be loaded:

IMPORTANT NEXT STEP: Sometimes Freesurfer gets stuck about granting user permission to run it. It gives the output “permission denied” during the next recon-all step. This may be an issue on a Rice server computer — it is suggested to use a non-university computer. Alternatively there is a computer in TSCAN Lab BRC 780L that works (contact their lab manager). To prevent directory issues, type in the following into Terminal and hit enter:
sudo chmod -R a+w $SUBJECTS_DIR
This should now give access to the subject’s directory in Applications where the software will be running from.
4.Reconstruct cortical surface: run recon-all
Now it’s time for the bulk of the 3-D printing time: running the reconstruction. Type in the following into Terminal. Come up with a subject directory, usually two initials like “FW”. For the .nii file directory, the .nii file can be dragged from the desktop and into the Terminal itself and Terminal will automatically write its directory:
recon-all -s [INSERT SUBJECT ID HERE] -i [INSERT .NII FILE DIRECTORY HERE] -all
Ex:

Now, hit enter and wait for the cortical reconstruction to run! This process takes anywhere between 9 to 15 hours. For maximum efficiency, it is recommended to change the computer settings so that the computer doesn’t sleep and is plugged in as often as possible.
Note: It is possible to let the computer sleep during the middle of recon-all as long as it does not exit out of the running shell. Freesurfer automatically pauses and begins the program once the computer starts up again.
Note 2: It is possible to run up to two subjects simultaneously to save time. Just make sure to run the same recon-all command on two separate terminal shells.
5.Convert Freesurfer files into 3-D printing .stl files
Once recon-all is done, Go to Applications/freesurfer/subjects/[SUBJECT ID]/surf and find the files lh.pial and rh.pial. These are the left and right hemisphere surface projections we need. Drag the .pial files to the Desktop. This will make it easier to access them later. Type in the following into Terminal. Drag the rh.pial file into Terminal to copy its directory:
mris_convert [INSERT RH.PIAL DIRECTORY HERE] rh.pial.stl
Repeat for the lh.pial file.
Next, go to http://www.meshlab.net/ and download and install MeshLab. Meshlab is a 3-D printing mesh viewing program. Open MeshLab. Go to File >> Import Mesh and load rh.pial.stl and lh.pial.stl. The window should look like this:
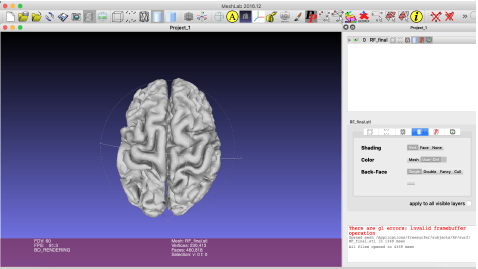
Rotate the 3-D mesh to make sure it isn’t deformed. To merge the mesh, select Filters >> Mesh Layer >> Flatten Visible Layers. Select File >> Export Mesh As to export the cleaned mesh. Label it as [PATIENT ID].stl on the Desktop.
6.Cleaning and solidifying the mesh
Before 3-D printing, we must solidify the mesh because it is a hollow shell and the printer will fail if we run it as is. To do this, we must download a mesh editing software. Go to https://www.blender.org/ and download and install Blender. Open Blender and select File >> Import >> stl and load the cleaned mesh file.
On the right hand side, click on the wrench icon, select Add Modifier and then select Solidify. Select a thickness around 7.0 and clamp at 2.0. Then click Apply. This increasingly adds thickness to the outer shell of the mesh so that it eventually becomes solid.
Optional: smooth the outer shell by going back to the wrench icon, select Add Modifier and then select Laplacian smooth. Usually a Factor of 5.0, a Border of 1.0, and a Repeat of 1.0 works, but it may require some fiddling around with depending on how bumpy the mesh is.
Select File >> Export Mesh As >> stl and export the solidified mesh. Label it as [PATIENT ID]_final.stl on the Desktop.
7.Final repairing (as needed)
Depending on the 3-D printer and the software used, these next few steps might be different. I recommend using 3D Sprint https://www.3dsystems.com/software/3d- sprint
We will be using the 3-D Sprint system with the Projet MJP 2500 printer located in Kemere Lab BRC 740 for steps 7-9.
On 3-D Sprint, Import the solidified mesh. If the mesh is outlined in red, this means that the mesh has some complications – usually open boundaries or self intersections. If this happens, close the boundaries pretty easily using the Fix tool which automatically cleans the mesh. If 3-D Sprint is not used, other CAD software is available online.
Note: 3-D Sprint works with its own brand of 3-D printers. If a printer compatible with 3-D Sprint is not used, the file can still be repaired in 3-D Sprint and exported to be printed elsewhere.
8.3-D printing the model
Finally, the brain is ready to be printed. Again, depending on the 3-D printing software used, these steps may be different. We print on the ProJet MJP 2500 printer in Kemere Lab BRC 740.
In 3-D Sprint, select Add to Print. Select the scale to print the brain using Transform. Note: Depending the size of the model, the printer might fail in the middle of printing. We will use 60% of full size. For full size or larger, it is recommended to go back to step 5 and load one hemisphere at a time in MeshLab and do steps 5-7 separately for each hemisphere. Select Quality Check to make one final check. Align the mesh within the boundary box, but as close to the right hand bar as possible where it will print the fastest (select Auto Place to do this).
The printing process will take anywhere between 15 to 26 hours.
9. Post-processing the model
Again, this may be different depending on the 3-D printer used, but many printers require a freezer to remove the print, and then a water bath and an oil bath to remove the structural wax residue on the prints. Follow the instructions carefully in the printing manual to post-process the model.